Sunday, June 25, 2006

Breakfast Frittata for dinner


Last week I was obsessed with the idea of making a frittata that included all the elements of a Sunday morning fry up: Eggs, bacon, potato, onion... Well, that and I have to use up a number of things in a week before summer vacation.

I have a basic frittata recipe I found long ago in my beloved Moosewood cookbook and have been using it as a base ever since. It was from this I concocted my Breakfast Frittata.

Nerissa's Brekkie Food Frittata

2 tbsp vegetable oil or butter (or combination)
1 large potato, cut into quarters and thinly sliced
1 medium onion, thinly sliced into rings
3/4 cup Canadian bacon, diced small
1/2 cup green pepper, diced small
1 1/2 tsp chopped fresh thyme
1 garlic clove, minced or pressed
5 large eggs, beaten
1/2 cup cheese (I used an Italian 4 cheese mix)

Heat oil in large skillet. Saute the potatoes and onion covered, stirry frequently, for about 8 minutes. Once they are mostly tender add bacon and green pepper. Saute with potatoes and onions until the green pepper is tender. Stir in the thyme and garlic. Pour beaten eggs over the sauteed vegetables, tilting the pan to distribute them evenly. Sprinkle on cheese, and salt and pepper to taste. Cover the pan and cook on low heat for 10 minutes, until the eggs are set and golden on the bottom.

To brown the top of the frittata: If your skillet is flameproof, simply place the frittata under a preheated broiler for about 2 minutes. Otherwise, carefully slide the frittata onto a plate and then flip over, back into the skillet, to brown the other side. Cut in quarters to serve.

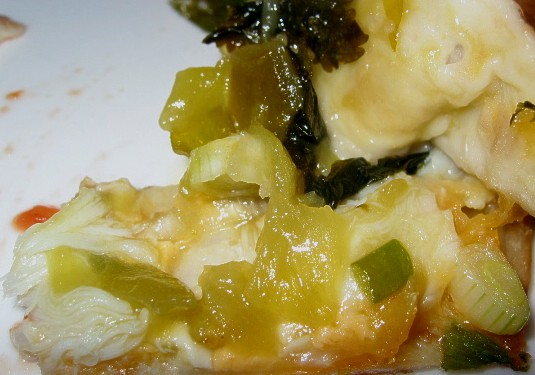
Pickled banana peppers go well with this rich dish as does the salad I served on the side.

Sunday, June 18, 2006

Sea Urchin: A Question


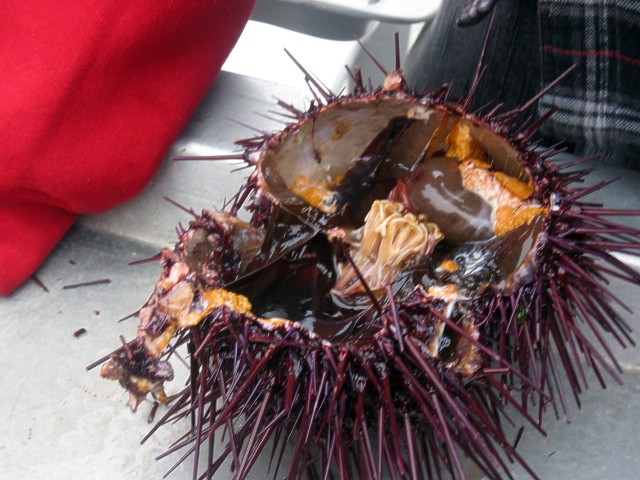
What do you do when you are offered a food that you know is potentially gross but may be the only chance you have to eat it for free? You plunge in and don't look behind you. It was offered during a cultural field trip we had last week. I found sea urchin, which was offered up straight from the ocean, to be pudding-like and tasted of the ocean from which it came. It wasn't offensive as I have found other raw sealife to be. I'm curious about how common this particular experience is and I have a question:

How many of you people out there have tasted sea urchin and how was it served if you did?


not everyone was thrilled with the cultural experience

Wednesday, June 14, 2006

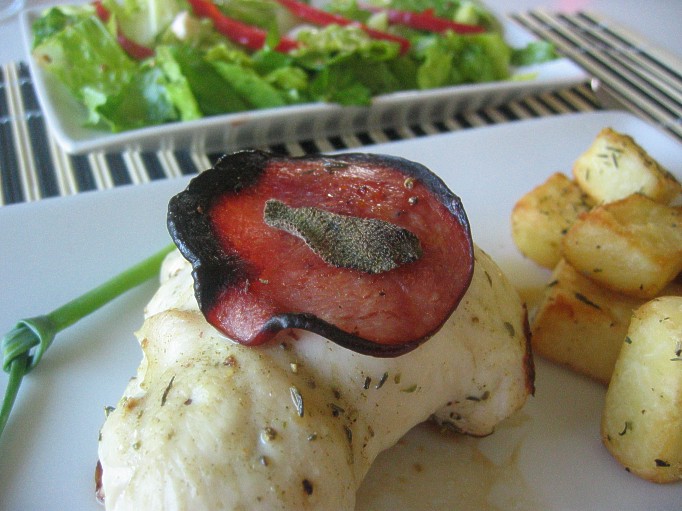
Cheese-Stuffed Chicken with Bacon


To those who have waited so very patiently, thank you. The end of school and my own health have created situations that waylaid me on my way to relating this chicken recipe to you.

The original recipe for the chicken was here at cooks.com but, due to lacks of certain ingredients, I adapted.

Cheese-Stuffed Chicken with Bacon, Canadian Style

4 sticks of mozzarella, cut to 1 x 0.5 x 0.5 inches each
4 skinless, boneless chicken breasts (about 1 1/2 lbs)
1 tsp dried, powdered sage
1 tsp salt
1 tsp pepper
4 fresh sage leaves
4 rounds of Canadian bacon

Heat oven to 500 degrees. Pound the chicken breasts lightly to an even thickness. Sprinkle both sides of the flattened breasts with salt, pepper and powdered sage. Roll each around a cheese stick, tucking in the ends so the cheese won't leak out (because it will, I assure you!) and secure with toothpicks. Place into a roasted pan, put a leaf on top of each wrap and then cover lightly with a round of Canadian bacon. Bake until the chicken is cooked through and the bacon is browned, about 15 minutes.

I served it with roasted Yukon Gold potatoes and Romaine salad simply dressed with French oil and vinegar.

It looks and tastes really nice and yet it takes barely any time.

Monday, June 12, 2006

Confessions in Groups of 5

It was only a matter of time before I got tagged again. Michelle, dear gal that she is, has tagged me for the 5 Items Meme.

It seems I have to mention 5 things in different parts of my life: my fridge, my closet, my car and my purse. Oh dear... I think I'm going to be a bit of a disappointment to those who read this. Read on and perhaps you'll understand why.

5 items in the freezer (technically I've done fridges here so I'll head to the frozen section)

1. lamb shoulder steaks (needed a lot of begging and wheedling to get them here)
2. butter (keep a good supply because they often forget to order more)
3. frozen peas (life wouldn't be the same without peas and need to keep them stocked)
4. smoked tofu ( I still haven't figured out what I'm going to do with them)
5. fish (this IS a fishing village after all)

5 items in my closet

1. blue & pink shirts (I have other colours but these outstrip the others in number)
2. extra blankets
3. Xmas decorations (not much storage room in this apartment)
4. 1/4 of my clothes I'm waiting to fit again
5. lots of dressing gowns and kaftans for some reason

5 items in my car

I don't have a car. Don't need one here.

5 items in my purse


Technically I don't have a purse. It's more like a big wallet. My fiance got disgusted with my use of a fanny pack and bought it for me.
Here's what's in it:

1. money (usually coinage but hey, who's counting)and cards of various kinds
2. receipts and bank statements
3. A small mirror with white tulip on the back (courtesy the Rikjsmuseum giftshop)
4. folding scissors (always handy in the most unlikely places)
5. a hair elastic (again, always handy in case of emergency)

Ho hum... It's my pockets you should really be looking at. A teacher's pockets are her most valued clothing accessory. It can carry

1. notes and notices
2. lip balm
3. chalk, pencils and/or pens
4. stickers
5. confiscated items (I've carried everything from rubber bugs to heelie keys)
and so much more...


I hate this part. I never know who's been tagged and I hate feeling like a Johnny-come-lately.

1. Melissa of Cooking Diva
2. Linda of Kayaksoup
3. Kalyn of Kalyn's Kitchen
4. Michele of Chef Michele's Adventures
5. S'kat of S'kat and the food

Wednesday, June 07, 2006

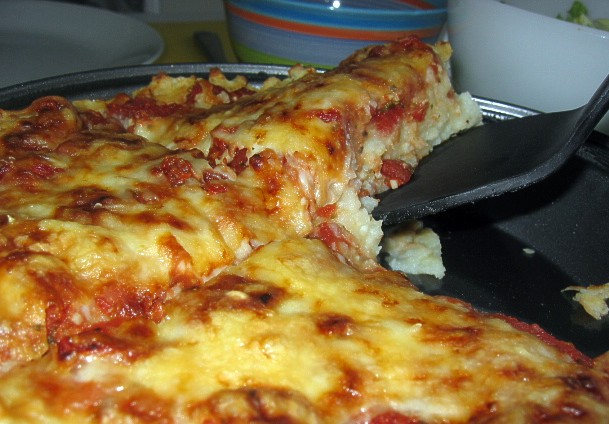
Italian Potato Torta


I have a big confession to make. I like to eat. For years I was in denial and it caused me a lot of pain. When I finally realized what I was doing to myself, I stopped. It got boring and to anxiety-causing to thinking about all the so-called horrors that eating can cause. Well, except one.

I have another confession to make. I'm largely of Scottish descent. Short, stocky, easily-gains-weight Scottish descent. This is the same genetics I've been fighting with that partially caused said anxiety and fear of eating and why I'm trying to change my eating habits.

I'm trying to cook lighter and healthier(easy in the summer) but I do not want to resort to eating like a mouse again. I'd rather not give up the flavour and variety. This torta isn't exactly of the lightest variety but it's my first stab at a tasty dish meant to be "light" (from a Cooking Light mag of April,2003).

Italian Potato Torta


6 cups cubed peeled baking potato (about 1 3/4 pounds)*
1/2 cup all-purpose flour
2 teaspoons olive oil
1/8 teaspoon salt
1 large egg
Cooking spray
1/4 teaspoon dried Italian seasoning
2 garlic cloves, minced
1 (14.5-ounce) can diced Italian-style tomatoes, drained
1 cup (4 ounces) shredded part-skim mozzarella cheese
3/4 cup (3 ounces) grated fresh Parmesan cheese
Thyme sprigs (optional)

Preheat oven to 450°.
Place potatoes in a saucepan; cover with water. Bring to a boil; cook 15 minutes or until tender. Drain. Return potatoes to pan; add flour, oil, salt, and egg. Mash potato mixture with a potato masher until smooth.
Spread potato mixture into a 9-inch round cake pan coated with cooking spray. Combine seasoning, garlic, and tomatoes; spread evenly over potato mixture. Combine cheeses, and sprinkle over tomato mixture. Bake at 450° for 25 minutes or until golden. Let stand 20 minutes. Cut torta into 4 wedges. Garnish with thyme, if desired.

*NB: I think you should not be overly generous on the amount of potatoes. Skimp on them a bit and it may not be as overflowing in the pan as mine was and the seasoning more appropriate.

Thursday, June 01, 2006

The Hunt for Fridge Room: A Space Oddity

In the beginning there was space. Lots and lots of space. But then Nerissa showed up and stuffed all her food in. Now there is no space. Not a single space.
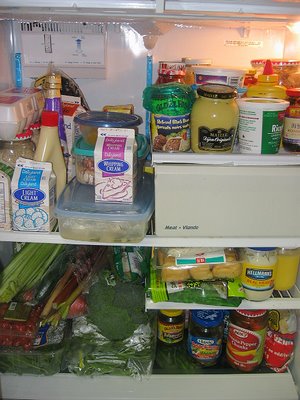


Okay, I exaggerate but not by much. My fridge is rarely foodless except at vacation time. And even then it's never completely empty. Consider the condiments...

Yes, let's start with the condiments. Some you see here. Some you don't. But I promise you that they are there.

List of condiments


Ketchup, yellow mustard, whole grain dijon mustard, regular dijon mustard, tarragon dijon mustard, 2 wasabi tubes, tamari, Newman's Own Thai dressing, Vidalia onion dressing, Japanese miso dressing, three kinds of miso, mirin, memmi soup base, tartar sauce, black bean sauce, hoisin sauce, mango chutney, three kinds of jam, ponzu, green jalapeno hot sauce, left-over maraschino cherry juice, sauerkraut, kimchee, three jars of tahini, two kinds of natural peanut butter, two jars of almond butter, capers, Hellman's mayo, Miracle Whip Lite, Kewpie Japanese Mayo, green curry paste, red curry paste,molasses, ghee, sun-dried tomatoes in oil, two kinds of maple syrup, El Paso salsa, roasted red peppers, two jars of raw olives in brine, and pickles... lots and lots of pickles. Pickled ginger, tabasco Vlasic dills, regular Vlasic dills (mmm), pickled banana peppers, pickled mango, pickled limes, jalapeno pickles, umeboshi pickles, pickled daikon, ummm... I think that's it. I don't think I have pickled beets anymore. *the sound of banging and crashing and the thump of returning feet* nope, all the beets are gone. *writes it on shopping list* ;-)

Now don't get me wrong. I don't live on condiments alone. I love fresh food and I have plenty of that.

Fresh Foods

Currently in stock are broccoli, snow peas, red peppers, yellow peppers, avocadoes-in-waiting, green onions, baby carrots, celery, baby spinach, radishes, beets, green cabbage, green beans, grape tomatoes, regular tomatoes, zucchinis, English cuke, green grapes, a couple mangoes, a papaya, lemons, ginger and limes.

Dairy

The dairy department isn't seeing the finest cheeses and yoghurts of late but is still well stocked. Sour cream, marscapone, lite cream cheese, parmesan, monteray jack, swiss, Havarti, smoked cheddar remains, mozzarella, aged cheddar, ricotta cheese that needs to be used up soon, buttermilk, whipping cream, half and half, lite cream, skim milk, processed cheese slices, salted butter, unsalted butter.

Some things don't quite fit into a definite category but they fit into my crowded fridge ;)

Wheat germ, pastry lard, Ribena, bread crumbs, 2 kinds of seaweed, pizza meat pack, pathetic white eggs, yeast, Minute Maid juice, vanilla pods. Bottled lemon juice, bottled lime juice, Pete's Tofu, Fried tofu puffs, udon noodles, Leftovers... of course

Then there are the ones that aren't even edible: umpteen jars of craft glue and a little jar of iodine for school experiments.


Essentials you'll never catch us without:

Me

Pickled anything.
Whole grain dijon mustard
Fruit
Baby carrots
eggs
Bottled lemon juice
butter

Frog:

Meat
Mayonnaise
Yellow Mustard
Processed cheese slices (<-- ick!!)
Bottled lemon juice

Hmm... that was rather telling, wasn't it! Not a jot of meat in the fridge except the leftover halibut. Very different essentials between the two of us. And I need to cut down on condiments. Really, I do.

Now I don't usually go around shouting out my fridge contents but Sweetnicks is hosting a fridgie tell-all in I'll Show You Mine If You Show Me Yours #1. Quickly come join our game so I don't feel like I'm in one of those weird dreams where you arrive naked at work and everyone laughs at you.

Wednesday, May 31, 2006

Not all Frozen Meals are Bad


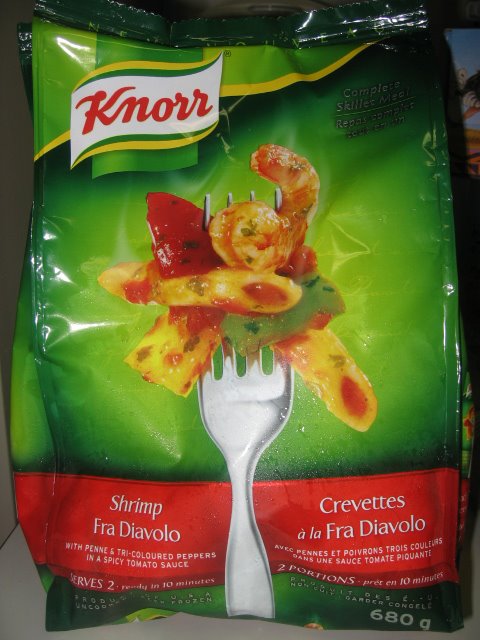
Knorr did it again. It took my belief that frozen dinners were barely passable in quality and took it to a level of "Oh my God! This tastes like it was personally made for me and left in the freezer for me to have later" I was pleasantly shocked on a day when I didn't have a lot of energy or time to make something elaborate that Knorr frozen entrees worked in a pinch. Our store had two types brought up north for our sampling. I can't say they were cheap up here but their taste made the price okay.


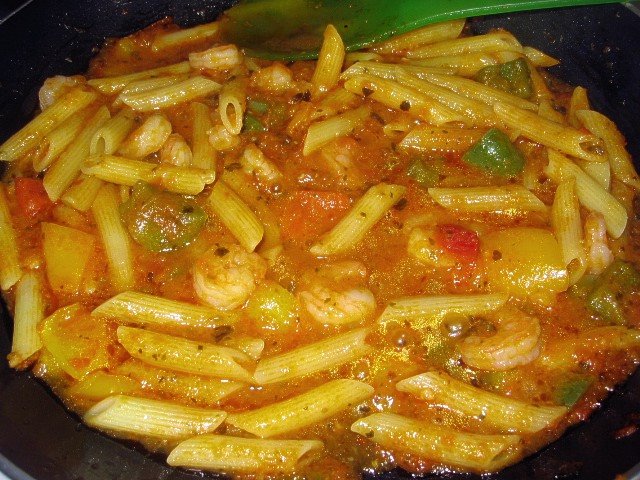
The one I tried first was their Shrimp Fra Diavolo. Their peppers were actual peppers and nothing reconstituted. The pasta was soft and melt in your mouth. The shrimp felt like shrimp and not mush. The sauce was quite spicy but not in a "cover up the bad food" way. It felt and tasted freshly made. No weird aftertastes in the mouth. I was even pleasantly surprised to see that they had suggested wine pairings on the back too!
I tried the other one, Spinach & Ricotta Ravioli in Tomato Wine Sauce, not long after on another crazy day. In general I liked it but it had FAR too much large garlic slices in it. I love garlic but not that much!
I only found these frozen entrees on the Canadian entrance of the website. Are these frozen packs only available in Canada?

Monday, May 29, 2006

Pollo Diavolo


Even before the time I was eating fish as my only animal protein I was never in love with chicken. I found the chicken I was served quite often inspid and boring unless with a very strong sauce. It wasn't the fault of the cooks, I was sure. It was just the nature of the beast. Modern, processed chicken sucked.
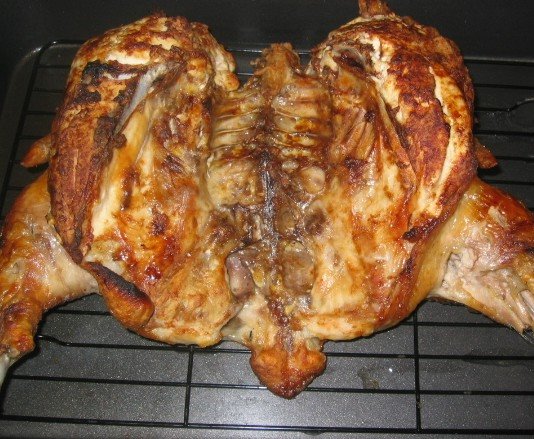
When I wandered back into the realm of eating chicken I wasn't impressed by the pathetic, water-infused excuse for chicken we can get around here. Then I encountered something new to me which changed my mind. Spatch-cocked whole chicken (from Shearwater not HERE), slathered in dijon mustard and olive oil and broiled. The addition of a mustard sauce for it was not so much of a tangy cover this time but an enhancement to the nice taste that, I'm sorry to say fat-phobics, the skin gave to the flesh. No dish this good should remain hidden so I offer up for you the recipe to Pollo Diavolo (Grilled Chicken with Mustard Sauce).


POLLO DIAVOLO -- An Umberto Menghi recipe


1 (2lb/1kg) frying chicken
1 clove garlic, cut in slivers
1 tbsp olive oil
2 tsp Dijon mustard
salt, to taste
freshly ground black pepper, to taste


Split chicken down the breast bone [spatch-cocking] but leave it attached by the back bone*. Flatten chicken out [the flatter the better].

Insert slivers of garlic under the chicken skin using the edge of a sharp knife. Rub the chicken with the oil and mustard [I mixed them together well before the rub]** Season with salt and pepper.

Make an incision on the inside of each thight along the bone to allow heat to penetrate chicken and for chicken to cook faster [Very wise. Do NOT skip]

Grill chicken on both sides for 10-15 minutes per side, basting chicken with oil as it cooks and adding more oil if necessary. ***

To test: pierce the inside of the thigh. If the juices run clear, chicken is done. Set chicken aside and keep warm.

Mustard Sauce:

1 tbsp butter
1 small onion, finely chopped
1 tbsp dry white wine
2 tbsp chicken consomme
juice of 1/2 lemon
1 tbsp Dijon mustard
salt, to taste
freshly ground black pepper, to taste

Saute onion in butter in a skillet on medium heat until onion is transparent.
Add wine and chicken consomme to onion and simmer on medium heat for 2-3 minutes.
Squeeze lemon juice directly into wine and chicken consomme and stir until well blended.
Add mustard to onion,wine, consomme and lemon juice. Stir until well blended and reduce by simmering on medium heat for 2-3 minutes.
Season with salt and pepper


Put chicken on a warm serving platter or on warm plates. Coat with sauce and serve.


* This entails removing the wishbone from the neck area if you want an easier time cutting. Not for the easily frustrated!
** For some morbid reason rubbing oil into the skin of a cold lifeless body made me think of Buffalo Bill in Silence of the Lambs when he tries to get his victim to moisturize her skin. Sometimes I'm a sick puppy ;-)
*** Don't be dumb like me and get worried that there is nothing to baste with in the first five minutes. I added a tbsp extra as suggested and proceeded to get volatile poultry spitting on the element. Terrified that the small flameballs produced by the spitting, I lowered the rack. It seemed to do the trick.

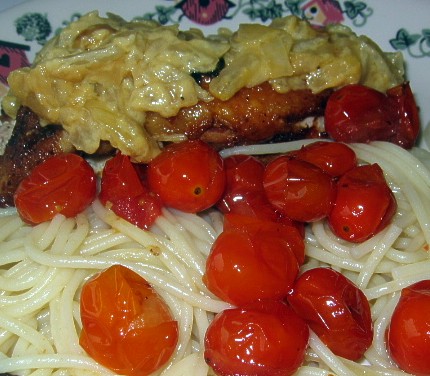
While I was cooking the sauce, I chucked some cherry tomatoes into the broiling pan with the remaining oil and juices and broiled them for about 7 minutes. Their sweetness enhanced, they made a nice counterfoil for the sharp mustard and the savoury chicken. We also had some pasta, on Bennyfrog's suggestion, and I was pleasantly surprised at how nicely it suited the chicken dish.


Ben's own picture of the beast in process. I could believe how excited he was about tasting this chicken. He started snapping pictures of everything. The only time I ever see him take pictures of things is when we are playing D&D!

Sunday, May 28, 2006

*sigh*

What do you get when you cross a metal wireless tower that now stands as the highest object in town and a fourth thunderstorm in five months? NO INTERNET! Why? It was fried by the lightning. Again.

It seems completely ironic to me that the year in which we finally get our wireless tower up, we seem to have suffered more thunderstorms in half a year than the elders say have happened in a decade! Go figure, eh? So, I'm back... hopefully.

Monday, May 22, 2006

Grilled Quails


There have been a lot of first for me this week. One of them was the hollandaise sauce, the other was my future post about a mustard chicken I made yesterday and the other was quail.

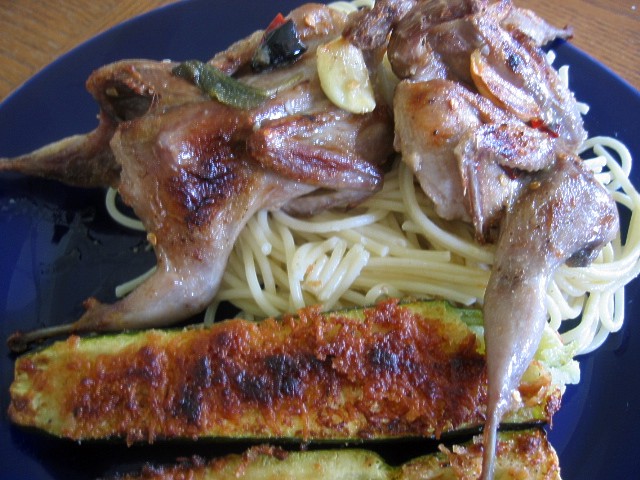
I got some quail at Christmas time and figured I should get them used up. Knowing The Frog's preference for savoury over sweet it left out a few recipes I did have for quail but, now that I had taken home a sage plant two months ago, I had what I needed for one I had looked at before: Grilled Quails. It's not fussy and pretty straight-forward. I was terrified of overcooking those teeny little things but a hovering Frog ensured "not yet... not golden enough... too grey... " Well... the pictures I took just didn't want to turn out well but the food itself was good both straight out of the over and as a midnight snack later (to which Frog will attest).

This leads me to my new favourite word of the week... "SPATCHCOCK"! I've done it now twice and let me tell you something... it's much easier to split a quail for roast than it is to split a chicken. Mu-u-u-u-u-u-ch easier. Snip snip and you have little spreadeagled quail bodies everywhere.

Here's the recipe:

Grilled Quails

4 quails [or 6 in my case.. they were very small]
2 1/2 tbsp lemon juice
4 tbsp olive oil
8 small sage leaves [I only had 6 large]
2 garlic cloves [3 for my 6 birds]
1 small red chili; seeded and roughly chopped
2 tbsp chopped parsley [forgot this, dang it, but it was still good]
lemon wedges

Split each quail through the breast bone with a sharp knife and then turn over. Press open hard with the heel of your hand to form a spatchcock. Transfer the quails to a shallow dish large enough to hold all the birds side by side.

Mix together the lemon, olive oil, sage leaves, garlic and chili and season to taste with salt and pepper. Pour over the quails and leave to marinate for 30 minutes, turning birds over after 15 minutes. Preheat the grill (broiler)

Place the quails, skin side up, on a grill tray. Position them 12-15 cm (5-6 inches) below the heat and grill (broil) for about 5 minutes on each side, or until golden and cooked through.

Serve hot or cold, with a sprinkling of chopped parsley and lemon wedges.


~


I served it with pasta and zucchini broiled with the quails. The zucchini were topped with breadcrumbs, butter and asiago cheese. Very Yum.

this recipe comes from one of my new favourite cook books: the food of italy: a journey for food lovers

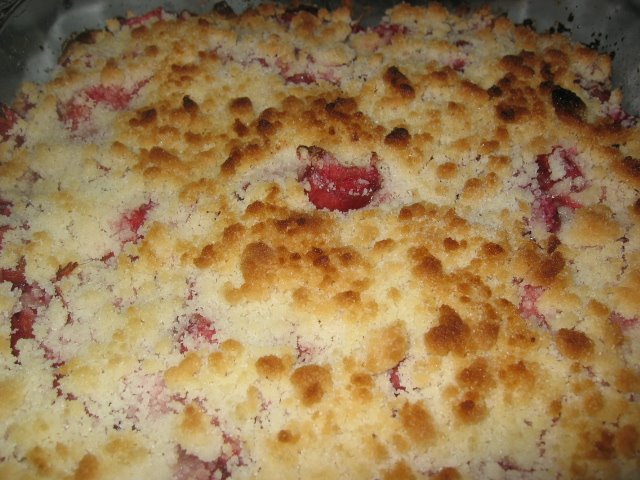
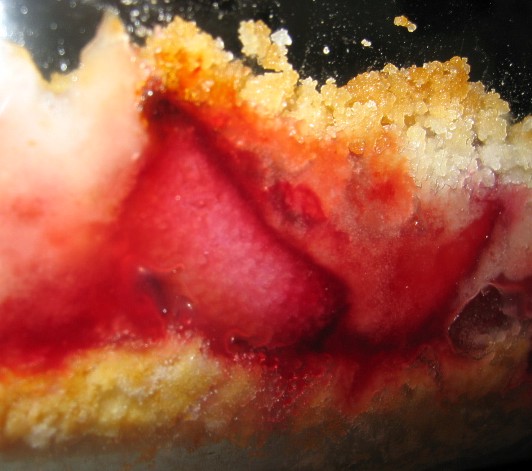
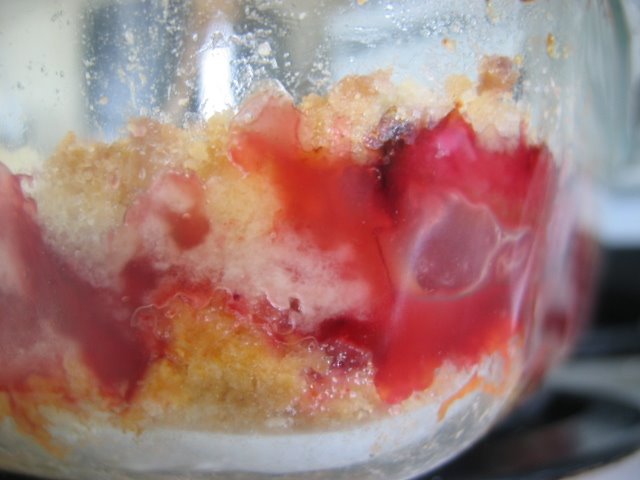
Rhubarb Kuchen


Every spring I can't wait for the fresh new rhubarb. Among the favoured baked fruit desserts in my family when I was a child was this scrumptious rhubarb dish: rhubarb kuchen. It's not overly sweet and is good warm or cold. There are some who will not let my mom bring anything but this for get-togethers. I don't blame them. You can use frozen rhubarb in a pinch too. I just prefer to use fresh.

Rhubarb Kuchen

preheat oven to 375F

Mix together: 1 cup flour
1 tbsp sugar
1 1/2 tsp baking powder
pinch salt

Cut in 1 tbsp butter

Mix one egg with 2 tbsp milk separately

When combined, add egg mixture to dry ingredients until just moist. Pat the resulting dough into bottom of a sprayed 8x8 inch pan. Set aside.

Combine: 1 package (85g size) of strawberry jello
1/3 cup sugar
3 tbsp flour
Mix with 3 cups diced rhubarb until well coated with jello mix.

Pour whole rhubarb mix over crust.

Mix well:2/3 cup sugar
1/3 cup flour
3 tbsp butter

Once combined, toss sugar mix (streusel) even over the top of the fruit layer.

Put into over and remove once the top is golden and the rhubarb tender

Sunday, May 21, 2006

Beginner's luck: Hollandaise Sauce


My beloved's birthday was last weekend but I made an actual birthday dinner for him on Monday last. I stupidly realized that I hadn't taken a picture of the lamb shoulder that I'd cooked for him (not perfect but definitely edible) until after it was all cut up.


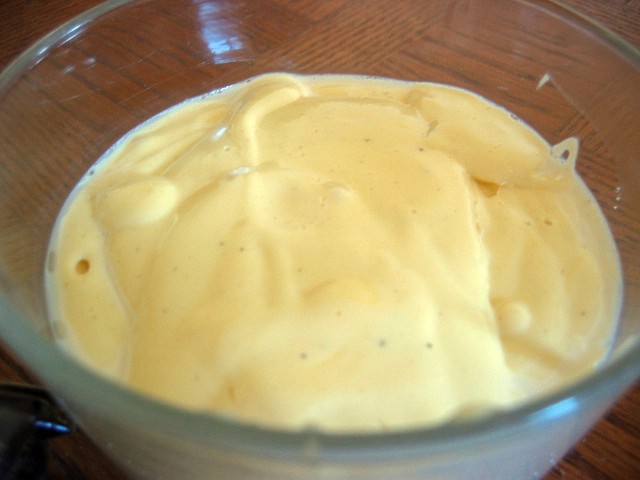
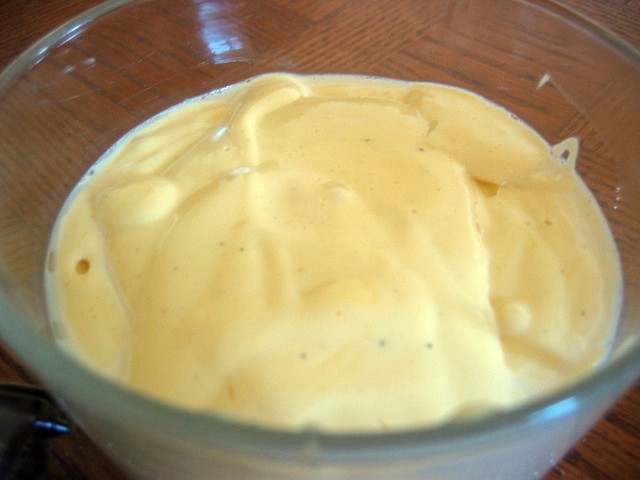
There was one thing that I was really proud of, though. At the last minute a mustard sauce was requested by The Frog. My only hope was the hollondaise based mustard sauce I saw in one of my newest cook books: The Cook's Book In a complete panic about the timing I resorted to using the blender version because the one over the simmering water scared the heck out of me for fear of curdling or something. I have to say that the blender version was not only good but "a perfect texture" according to said Frog. The taste was really good although not as mustardy as he'd hoped. I'm including here the basic recipe because everyone should have a chance at making Hollandaise without fear.


Hollandaise Sauce: In a Blender

Makes 2 1/2 cups

2 tbsp white wine vinegar
2 tbsp water
1 tsp lightly crushed white peppercorns
4 egg yolks
1 cup (2 sticks) unsalted butter, clarified
juice of 1/2 lemon
pinch of cayenne pepper

1) Place the vinegar, water and peppercorns in a small, heavy-based pan and bring to a boil. Lower the heat and simmer for 1 minute, or until reduced by one-third (to about 2 1/2 tbsp). Remove from heat and leave until cold, then strain the liquid into a blender, adding a pinch of salt and pepper.

2) Place egg yolks with vinegar in blender. Blend for a few seconds [I did it for about 15 seconds but didn't seem to matter]. Heat the clarified butter. With the machine switched to the highest setting, trickle in the hot butter and blend until thick and fluffy. Add the lemon juice and seasoning.

Voila! It's just that simple.

Now, mind you, you have to clarify butter yourself if you can't get it in the store but that's only a matter of skimming off the solids while the butter slowly melts in a pan. That's easy enough for me. It's easy enough for anyone then.

~

To add a mustardy taste you can add 1 tbsp Dijon mustard at the end of the blending. Maybe it should be two if you REALLY like the taste of mustard like The Frog.

Thursday, May 18, 2006

FYI


For those of you who do go to my daily photo blog, I just want to let you know that I have changed the URL to http://deetsasdailyphoto.blogspot.com

I'll have a some posts up for you all soon on my food blog. Got a little bogged down by work to think straight. In the meantime, here are some pictures of some of the food about which I will be blogging:

Thursday, May 11, 2006

Local Foods: Berry Shoots


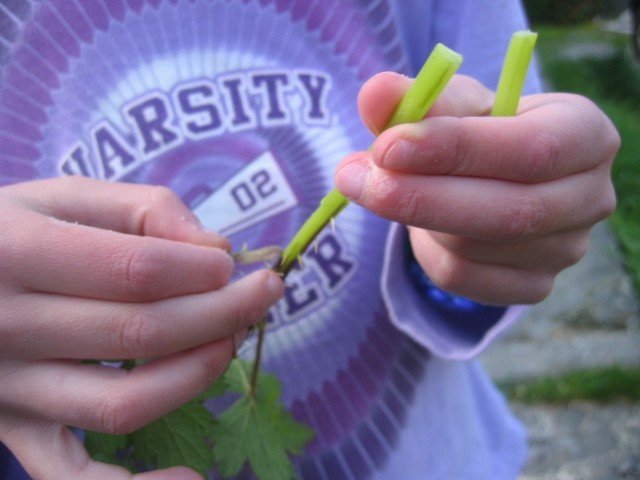
So I was thinking about local food from this island. And thinking. And thinking. And it seemed every time I thought about it lately I was coming across kids with hands full of salmonberry shoots or hearing kids at the door begging their mom for 'some sugar, please!' or nearly bumping into kids suddenly stumbling out of large berry bushes with translucent green stems in their fingers. DUH!! There was my local food right there!

Every year the children in areas with salmonberry bushes treat themselves to the first taste of the berries before there are berries on the bush. A goodly chunk of the local kids know that the newest shoots on a salmonberry bush are sweet and tender once you pull off the thin thorny outer layer. Within lies a green stem generally between 2 to five inches long. Now you CAN eat them sans the sugar dip favoured by the kids, and no doubt this was the way used in the past, but the kids prefer to eat it with sugar to further enhance the berry taste. I've eaten them both ways and have to say that I prefer them with. The ones without do have a little bit of a astringent nature if eaten in too much quantity. Plus the sugared ones taste more like my preferred orange variety of berries than the more astringent reds.

Now I don't know if people can cook with them or not but I honestly don't know why not. Maybe I'll just have to make something up! Any suggestions?

Sunday, May 07, 2006

Burnt hands and Halibut in Sorrel Sauce

You ever have one of those days when it takes at least three repetitions to understand what you are doing wrong? On Friday I found myself in the position of using a cooking technique that I've never done before: poaching fish in a frying pan inside an oven, removing the pan from said oven, removing the fish and then using the poaching liquid to make sauce. I am used to making a sauce seperately and/or cooking the fish on the stovetop. In the course of making the sauce I tried to move the now skin-sizzlingly hot pan around a few times. I grabbed the scorching handle THREE TIMES! It's a wonder I didn't do serious damage to myself. I think I'm paranoid enough not to do it again but sheesh! What does it take to get things in my brain these days?

The recipe itself was nice and basic: poached fish, a white sauce with wine and herbs. I can even claim it as a tribute to this month's blog theme: Eating Locally. The halibut was caught within a few kilometres of here. The sorrel comes from my own garden. It's probably as good as I will get for local food unless I make a seaweed salad or wait to the month's end for salmonberries. I think the fish dish was great but I'm a little disappointed in my sorrel which seems to have lost its sour edge. I'd repeat it with newer shoots a next time. Just remind me to wear heatproof gloves next time.


Halibut in Sorrel Sauce

Serves 4


Ingredients
1/3 cup dry white wine
1/3 cup water
parchment paper
4 halibut fillets (6 oz each)
1/2 tsp salt
1/8 tsp pepper
1 Tbsp butter

Preheat the oven to 400F.
Bring wine and water to a boil in a large oven-proof skillet that can hold fish fillets in one layer. Turn down the heat so that liquid barely simmers.
Cut a piece of parchment paper into a circle the size of the skillet. Butter one side of parchment paper and set aside.
Season fish fillets with salt and pepper. Place fish in the skillet and dot with butter.
Cover the fish with parchment paper, and tuck the edged of paper into the pan so that they touch the liquid and seal the fish.
Bake in the middle of the oven for 10 minutes per inch of thickness. The fish is done when you can separate the flakes with a fork, but just a touch of translucency remains in the middle. Remove the fish to a plate and cover to keep warm.


2 tsp softened butter
2 tsp flour
1/4 cup heavy cream
1/3 cup chopped sorrel

Set the skillet with poaching liquid on the stove top over high heat, and reduce by half (about 5 minutes).
Mash flour and butter together into a smooth paste.
After the liquid has reduced, turn the heat down to low and whisk the butter paste into it until smooth. Turn up the heat and bring to a boil, stirring until the sauce thickens, 1-2 minutes.
Stir in the cream, bring to a boil stirring constantly. Season to taste with salt and pepper.
Take off heat, and stir in sorrel.

Pour the sauce over halibut and serve.

For the life of me, I can't remember where I found this recipe but I know it's from the Net. It recommended wild rice and asparagus as side dishes. Can't say I could find any asparagus to use but I did have wild rice on hand. I think it was a good flavour match even if the Frog didn't. I don't think he liked it very much because it was chewy and not starchy. A pity since it tastes so toasty and yummy. But that's okay because there's more for me ;-)

Thursday, April 27, 2006

Pastitsio

The Plain Jane


The Snazzy Stir-fry


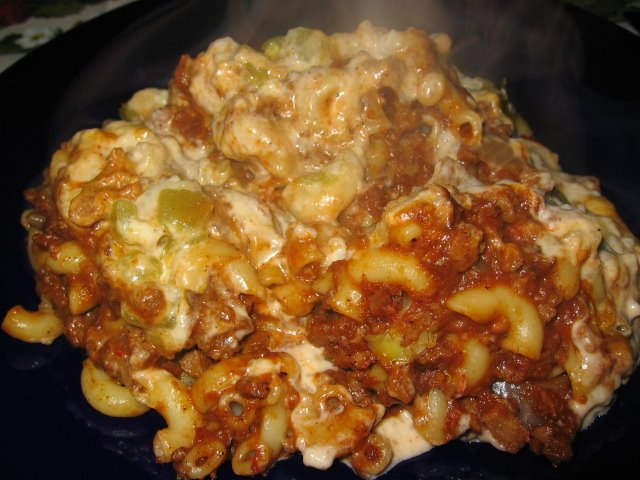
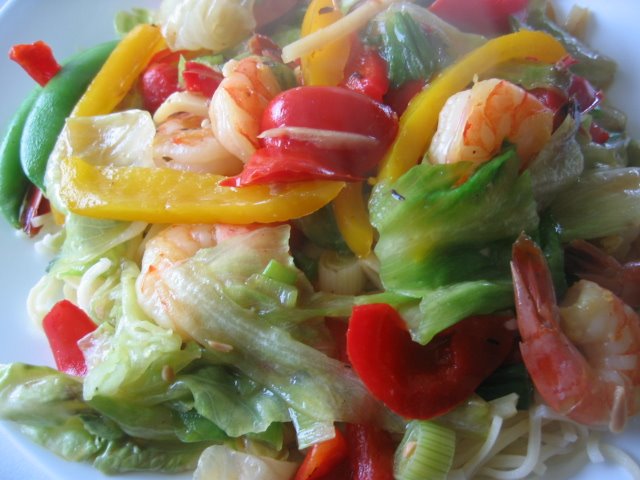
It's ironic that some of the most favoured comfort foods don't photograph well. Perhaps it's the gooey, creamy textures. Maybe it's the well-chopped, well-cooked nature that makes it a dull, plain-Jane next to a snazzy stir-fry or a glittering confection. It could be because we put in it the foods that are meant to dull the senses instead of excite them. But it still needs to be talked about because it's the foods that takes the edge off a nasty day at work or lets us linger in the fond memories of childhood. We run back to these foods because we know they may not excite the eye but they DO excite the nose and taste buds.

One such dish in my repetoire, inherited from my mother, is Pastitsio. It's a dish I'm sure that many are familiar with in its form if not under the same name. I changed it a long time back because I still desired its undulating, spicy goodness but couldn't handle the greasy meat that made up a good part of it. Instead I used a vegetarian mock ground round made by Yves Veggie Cuisine. It substitutes well so long as salt-free tomato sauce is used. Mockmeat becomes horribly attracted to salt if too much is used and makes the dish unpalateable. And please don't poopoo the use of the sweet spices. They really do make the dish what it is. Even Ben likes it and he has a horror of mixing sweet spices with meat.

PASTITSIO


1/2 pound very lean ground beef (or soy-meat equivalent)
1/2 cup onions, chopped
1 can(8oz) tomato sauce
1/2 tsp salt
1/2 tsp pepper
1/4 tsp cinnamon
1/4 tsp allspice
1/4 tsp nutmeg
8 oz elbow macaroni, cooked
2 tbsp parmesan (grated)
1 1/4 cups milk
2 tbsp flour
3 drops tabasco (or a small can of green chiles as I used when my bottle
disappeared)

Preheat oven to 375 F. Spray 8x8 pan with Pam. Spray skillet. Brown meat and onions in skillet (if you use mock meat, you may want to start the onions a bit earlier) for three minutes or until meat is no longer pink. Pour off and discard excess fat. Add tomato sauce, 1/4 tsp salt, 1/4 tsp pepper, cinnamon, allspice and nutmeg. Mix in hot macaroni and parmesan. Spoon into baking pan.

In the same pan with leftover bits of sauce within it, stir together milk and flour in skillet until very smooth. Lower heat and cook 1 minute or until mixture thickens slightly. Stir in tabasco, remaining salt and pepper. Pour white sauce over the meat and macaroni mixture in pan. Bake in oven 25 minutes.

NB: I didn't have tabasco but did have some green canned chiles so I put them on the white sauce. They added a nice contrast and the buzz that tabasco brings. I use a glass casserole and found no need for spraying necessary to keep it from sticking. In using mock meat you also rarely need spray for the pan if you have a good teflon pan to cook it in. I made sure to add the bit about keeping the pan dirty for the white sauce as this was never in the original recipe but just an understanding passed from mother to daughter. Plus it saves time ;-)

Wednesday, April 26, 2006

Crab Quesadillas

I love food stuffed in a doughy product. I love samosas, burritos, perogies, calzones, spanakopita... and I love quesadillas too! Last week, when I was going through a "cooking like crazy" phase one day I found and made these great, most repeatable treats--crab quesadillas. They were quite stuffing and could have satisfied me for dinner alone (if I hadn't so crazily created Mexican fried chicken and Potatoes con Queso too). I like how the crab paired off with the cheese (I had to add the pepper in the pepper jack. Not in MY store these days). The chilies I had were a bit too mild for my taste but not that bad. Of all the things I'd made that day, this was really quick. I think I was done in twelve minutes.

I don't really have the most ideal of pictures to show but it will give an idea of the inside and outside.


Go here for the recipe. I found I really like this new recipe site: "That's My Home". Lots of great ideas including this post's dish.

Monday, April 24, 2006

Chicken Meatball Curry


I have no idea where I got this recipe from bookwise. I found it when clearing out some papers this weekend and I remember I copied at my mom's house from some book. I just don't remember if it was a library book or from her own shelf of recipe books. Whatever the case may be, it's a keeper. A BIG time keeper. Despite its being a bit long in the making (for me) since I had to microwave-defrost and debone each thigh, it is a very straightforward. I had to replace one or two products, too, but it didn't seem to effect the flavour at all.

I figured it would be edible and maybe even good but I was stunned at just how good it was! It's not the prettiest looking dish on the block but its flavour makes up for it immensely.


Chicken Meatball Curry


2 lbs chicken meat (I used thighs--it's all I had)

2 tbsp chopped onion (actually I probably had more like 3 tbsp in mine)

1/4 cup bread crumbs

1 egg

1/2 tsp cayenne, turmeric, ginger powder, black pepper, dried basil, dried thyme
each leaves, dried oregano, paprika (I made each one a heaping 1/2 tsp)

1 tsp salt

1 minced garlic clove

3 tbsp safflower oil

2 tbsp butter

2 tbsp all-purpose flour

1 tsp curry powder (heaping for me)

1 1/2 cup Chicken stock (replaced it with Veggie stock)

3/4 cup light cream (had to use heavy cream as it's all I had)


In a food processor coarse chop the chicken. Add onions, bread crumbs, egg, seasoning, and garlic. Process into a fine mix (not too much or it gets sticky). Remove and shape into small balls (works for larger walnut-sized ones like I did too)

Heat oil in large skillet and brown the meatballs. Drain all the oil (I did it in batches and put them on paper towel). Transfer meatballs to a casserole dish.

Heat butter in a sauce pan. Add the flour and curry powder. Stir and cook for 2 minutes over low heat. Add stock and cream. Simmer for 5 minutes. Pour sauce over meatballs in casserole dish. Cover casserole and bake in preheated oven (350 F) for 45 minutes. Serve with rice.

Thursday, April 20, 2006

Samosa Satisfaction At Last


I love samosas. Who wouldn't? Spicy veggies or meats pocketed in a little pillow of dough and deep fried. Ask me if I want a samosa and I will gladly say yes. Ask me to make my own and I would get shivers and balk at the thought, turning and running like the wind. No matter how hard I tried, I could never ever ever ever get the dough right for the pockets. I thought I'd never have the pleasure of samosa heaven. Then I found out about pre-cut samosa wrappers. I bought about three packages on my last sojourn south. Wanna know what happened when I tried them out for the first time? I happy-danced all over the kitchen when I sealed up my first little pillow of samosa filling in that little pocket. It was like I had reached samosa enlightenment. I near-danced and sang my way through the rest of the pocket-forming and -filling. "Samusa Wrappers" You SAVED MY SANITY!

I made two kinds of samosas. One kind for me. One kind for Ben. For eons I haven't been able to tolerate ground beef without getting ill but Ben loves it. So mine enjoyed a spicy potato filling that suited me just fine.

Meat Samosa Filling (adapted from The Complete Indian Cookbook by Mridula Baljekar):

2tbsp cooking oil
2 medium-sized onions, finely chopped
8 oz lean ground lamb or beef (I used beef. Where would I find ground lamb here?)
3-4 cloves garlic, peeled and crushed
1/2inch cube ginger, finely grated
1/2 tsp ground turmeric
2 tsp ground coriander
1 1/2 tsps ground cumin
1 tsp chili powder
1/2 tsp salt or to taste
1/2 cup warm water
1 cup frozen peas
2 tbsp flaked coconut
1 tsp garam masala
1-2 fresh green chile peppers, finely chopped, seeded for a milder flavour
2 tbsp chopped coriander leaves (Ben isn't so fond so I cut it down to a smidgen)
1 tbsp lemon juice
[NB: There was a tad more meat than asked for and I know Ben likes spices so I doubled up on all spices]

1. Heat the oil over medium heat and fry the onions until they are lightly browned
2. Add the meat, garlic and ginger. Stir and fry until all the liquid evaporates and adjust heat to low.
3. Add the turmeric, coriander, cumin, chili powder, and salt. Stir and fry until meat is lightly browned.
4. Add the water and the peas, bring to a boil, cover and simmer for 25-30 minutes. If there is any liquid left, take the lid off and cook over medium heat until the mixture is completely dry, stirring frequently.
5. Stir in the coconut, garam masala, green chili peppers and coriander leaves.
6. Remove from heat and add the lemon juice. Cool thoroughly before filling the pastry.

Vegetable Samosa Filling (adapted from The Complete Indian Cookbook by Mridula Baljekar):

3 medium-sized potatoes
2 tbsp cooking oil
1/2 tsp black or white mustard seeds
1 tsp cumin seeds
2 dried red chili peppers, coarsely chopped (I suppose you could seed them. I didn't)
1 medium-sized onion, finely chopped (I like onion. I used a large onion)
1-2 fresh green chiles, coarsely chopped and seeded for milder flavour if desired
1/2 tsp turmeric
1 tsp ground coriander
1 tsp ground cumin
1 tsp salt or to taste
1 tbsp chopped coriander leaves (Don't have much so did what I could)

[NB: like with Ben, I like spices so I double up on the spice amounts. Also added some lemon juice like Ben's by accident but actually adds a nice zing]

1. Boil the potatoes in their skins, allow them to cool thoroughly, then peel and dice them
2. Heat the oil and add mustard seeds. As soon as they start crackling, add the cumin seeds and red chili peppers. Stir. Add the onions and green chili peppers. Fry until the onions are soft. Add the turmeric, coriander and cumin.
3. Stir quickly and add the potoatoes and the salt.
4. Reduce heat to low, stir and cook until the potatoes are thoroughly mixed with spices
5. Remove from heat and stir in coriander leaves. Cool thoroughly before filling the samosas.


Last steps for both:
A) Follow samosa wrapper instructions for folding and filling. Complete the pockets before doing next step.
B) Fill frying pan with oil up to 1/2 inch. Heat. When hot drop in samosas about four or five at a time. Fry on one side until golden brown, flip and fry other side. Remove from pan and drain on paper towels.

You'd need two packages of "Samusa Wrappers" for this or you will have leftovers like I did. Well.. of the meat. Ben took the potatoes as a side dish.

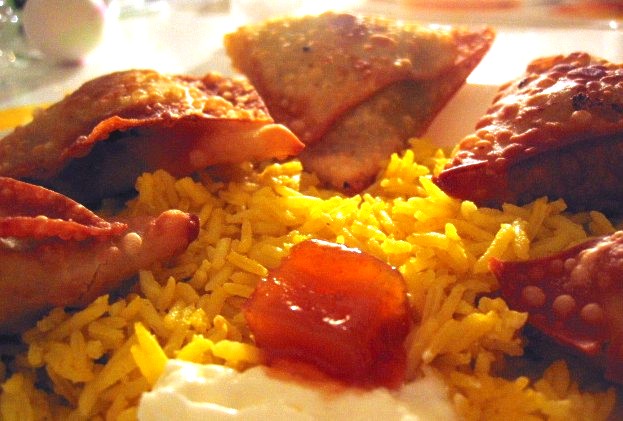
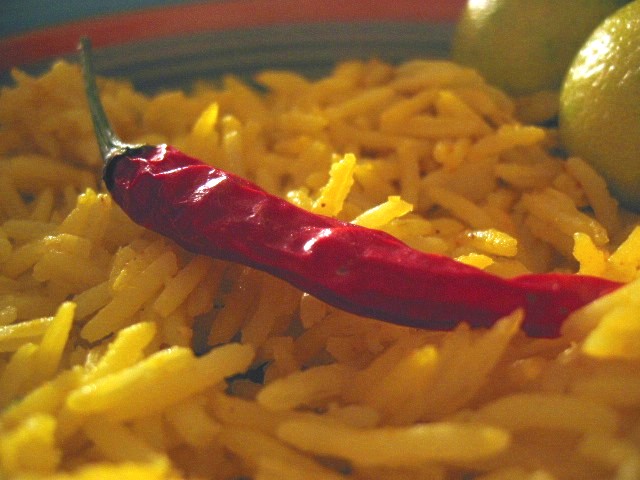
We also had it with my favourite Indian food accompaniment: Coconut Rice (recipe at a later time)

Wednesday, April 12, 2006

Trout with Lemon and Capers


Even though the grey days are trying to continue the feel of winter, little jolts of spring are everywhere. From the evening "cheery-up" of robins, the splash of magenta salmonberry flowers, the clouds of seagulls feasting on herring to the mini-vw sound of the hummingbirds in hot pursuit of rivals, the blahs of the colder months are being shooed out of Waglisla. Even some foods can chase away those winter blues. Rainbow trout is just such a contender. I've rarely had trout but when I did, it was always in summer. So, psychologically, I tag warm weather to the taste of these little beauties.

Now the problem was that I had never actually cooked trout myself. I always got it from others and it was always cooked. So, what to do? I found a very simple recipe that lends itself well to such a tasty fish at cdkitchen.com which involved very little work and needed little in the way of ingredients I didn't already have. THAT, of late, is a big bonus. Our shelves have been a bit more empty these days since our major source of food delivery, the ferry "Queen of the North", sank some weeks ago.

The recipe is basically one of flouring and frying the fish. After playing with their jaws to make my own ventriloquist act for Ben, I did just that. Served with a butter-caper sauce, boiled potatoes and salad, it was a nice, bright tasting pick-me-up. So, without further ado: Trout with Lemon and Capers